


Deploy Guide: From Project Setup to Continuous Delivery
A Step-by-Step Blueprint for Seamless Deployment. From First Commit to Continuous Updates.

A successful deployment process starts at the very beginning of your project. In this guide, I’ll cover how to set up your codebase, integrate quality assurance at every step, and leverage modern tools and platforms for smooth deployment and hosting.
This guide is designed to be comprehensive and technical without sacrificing clarity. Whether you’re deploying a simple static site or a complex microservices application, the strategies, tools, and code examples below will help make your deployment process as stress-free as possible.
Project Setup and Codebase Organisation
Version Control
Before even starting to code, you have to choose how you’ll version your code and how you’ll organise your branches.
Use Git to manage your code. A clear branching strategy (e.g., Git Flow or trunk-based development) keeps your work organised.
For example, consider:
Trunk-based Development: Keep a single main branch (e.g.,
mainormaster) and create short-lived feature branches.GitFlow or Feature Branching: Use separate branches for development, staging, and production if your team requires additional structure.
Branching Conventions:
Use clear naming conventions (feature/bugfix/hotfix) to keep track of changes:feature/awesome-featurebugfix/fix-typorelease/v1.0.0
bash

# Create and switch to a feature branch
git checkout -b feature/my-new-feature

# After making changes, add and commit them
git add .
git commit -m "feat: add new feature X"

# Push the feature branch to the remote repository
git push -u origin feature/my-new-feature
Code Organization
Keep your code modular and well-documented. Structure your repository to separate source code, configuration files, documentation, and tests.
Tip: GitHub Copilot is extremely good at documenting your code. Take the time to update the README file and write inline documentation. Future you will thank you!
Repository Organization
Organise your project by separating source code, tests, configuration files, and documentation. For example:
Establish a logical directory structure:
bash

/project-root
  /src           # Application source code
  /public        # Static files (HTML, CSS, images)
  /tests         # Unit, integration, and end-to-end tests
  /config        # Environment-specific configuration files
  /scripts       # Build and deployment scripts
  README.md
  .gitignore
  package.json    # Dependency management for Node.js (or similar for other languages)
Dependencies & Project Management
Package Manager
Utilise npm, yarn, or pip to manage dependencies and maintain a lock file for consistency.
Environment Isolation
Use virtual environments, like Python’s venv or Node’s nvm, or containerization with Docker to ensure consistency across development and production.
Without an environment management things can get really messy!
Tip: In python you can export your environment dependencies with:
pip freeze > requirements.txt
Configuration Files
Configuration files are essential because they separate environment-specific settings or secret keys from your application’s code. This separation allows you to update crucial information or credentials without modifying the code, making deployments smoother and more secure.
It also simplifies managing different environments (development, staging, production) by enabling you to swap configurations dynamically.
Development Environment
Try to mirror your production setup as closely as possible. This will prevent future hiccups and create a smooth deployment process. Tools like Docker help create identical local and production environments.
Utilise Environment Variables
Utilise environment variables to manage sensitive data like API keys, and database credentials You can create a .env file for local development.
Docker for Consistency
Containerising your application guarantees that development mirrors production.
dockerfile

# Use an official Node runtime as a parent image
FROM node:22-alpine

# Set the working directory
WORKDIR /usr/src/app

# Copy package.json and package-lock.json
COPY package*.json ./

# Install dependencies
RUN npm install

# Bundle app source
COPY . .

# Build the app for production
RUN npm run build

# Expose the port the app runs on
EXPOSE 3000

# Start the app
CMD ["npm", "start"]
Multi-Container Applications
Use a docker-compose.yml to orchestrate multi-container applications.
A multi-container application runs different parts of an app in isolated containers that communicate to deliver a complete service.
i.e. An online store where the web server, API, database, and payment processing each operate in separate containers for independent scaling and maintenance.
Here's a docker-compose example:
yaml

version: "3.8"
services:
  app:
    build: .
    ports:
      - "3000:3000"
    env_file:
      - .env
    depends_on:
      - db
  db:
    image: postgres:17
    environment:
      POSTGRES_USER: user
      POSTGRES_PASSWORD: password
      POSTGRES_DB: myapp_db
    ports:
      - "5432:5432"
Test your Code
Writing Unit tests can be frustrating but it can save you a lot of time later on!
Unit tests ensure that different parts of your application work together and handle errors properly. You can use tools like Jest or Mocha.
Tip: Copilot is greater for generating unit tests as well of finding more use case for testing your functions and components.
End-to-End Testing
Use tools like Cypress or Selenium to simulate user interactions and verify end-to-end functionality.
Test Automation via CI:
Add tests to your CI pipeline to run on every commit. Use CI tools like GitHub Actions or GitLab CI to run tests on every commit.
Here’s an example of GitHub Actions YAML:
yaml

name: CI Pipeline

on: [push, pull_request]

jobs:
  build-and-test:
    runs-on: ubuntu-latest
    steps:
      - uses: actions/checkout@v4
      - name: Setup Node.js
        uses: actions/setup-node@v4
        with:
          node-version: '22'
      - name: Install dependencies
        run: npm ci
      - name: Run Unit Tests
        run: npm test
      - name: Build the project
        run: npm run build
Deployment Platforms and Tools
Many people think that developing your app is where the party ends. This can’t be further from the truth. The real challenge begins when you need to make your application accessible, scalable, and maintainable in a live environment.
Deployment is more than just pushing code—it’s about ensuring reliability, performance, and seamless updates.
Choosing a Platform
Choosing the right platform and approach can make or break your app’s success… or your nerves.
Here are some of the basic platforms :
GitHub Pages: Perfect for hosting static websites like portfolios or project docs. It’s free for public GitHub repositories and easy to set up, but it only supports static content—no server-side processing.
Cloudflare Workers: Suited for serverless applications requiring dynamic content. It runs JavaScript on Cloudflare’s edge network, offering great performance and scalability, but… It’s a bit trickier to learn.
Netlify (My Fave): A beginner-friendly choice for static sites and single-page apps (SPAs). It provides continuous deployment, a CDN, and SSL out of the box, with a solid free tier and it supports dynamic features via serverless functions. It’s ideal for personal projects balancing simplicity and modern deployment tools. Netlify makes deployment an enjoyable process.

In general, there are many options to choose from. Unfortunately, the right choice should be based on your project’s complexity, traffic and requirements and not ease of use!
Deployment Approaches
There are many ways to deploy your new code to production. Choosing the right approach can mitigate risks or make the process easier.
Here are the 5 most common deployment strategies:
Big Bang Deployment:
Deploy everything at once in a single release. This approach is quick and straight, forward, but can be risky if issues arise, making it better suited for smaller or less complex projects, like your personal project.

Example: Microsoft historically shipped major Windows updates in a single large release. Maybe that’s why all of their apps are a bit buggy.
Rolling Deployment:
Update your application gradually, replacing old instances with new ones. This minimises downtime and issues, but… it’s slow.

Example: Netflix frequently uses rolling deployments, continuously updating portions of its server fleet. So really nobady can stop you from watching you favourite show.
Blue-Green Deployment:
Maintain two production environments, named blue (idle one) and green (live one). Deploy new code to the idle environment, test thoroughly, and switch traffic once everything is verified. This strategy seems perfect until you see the invoice… yikes!
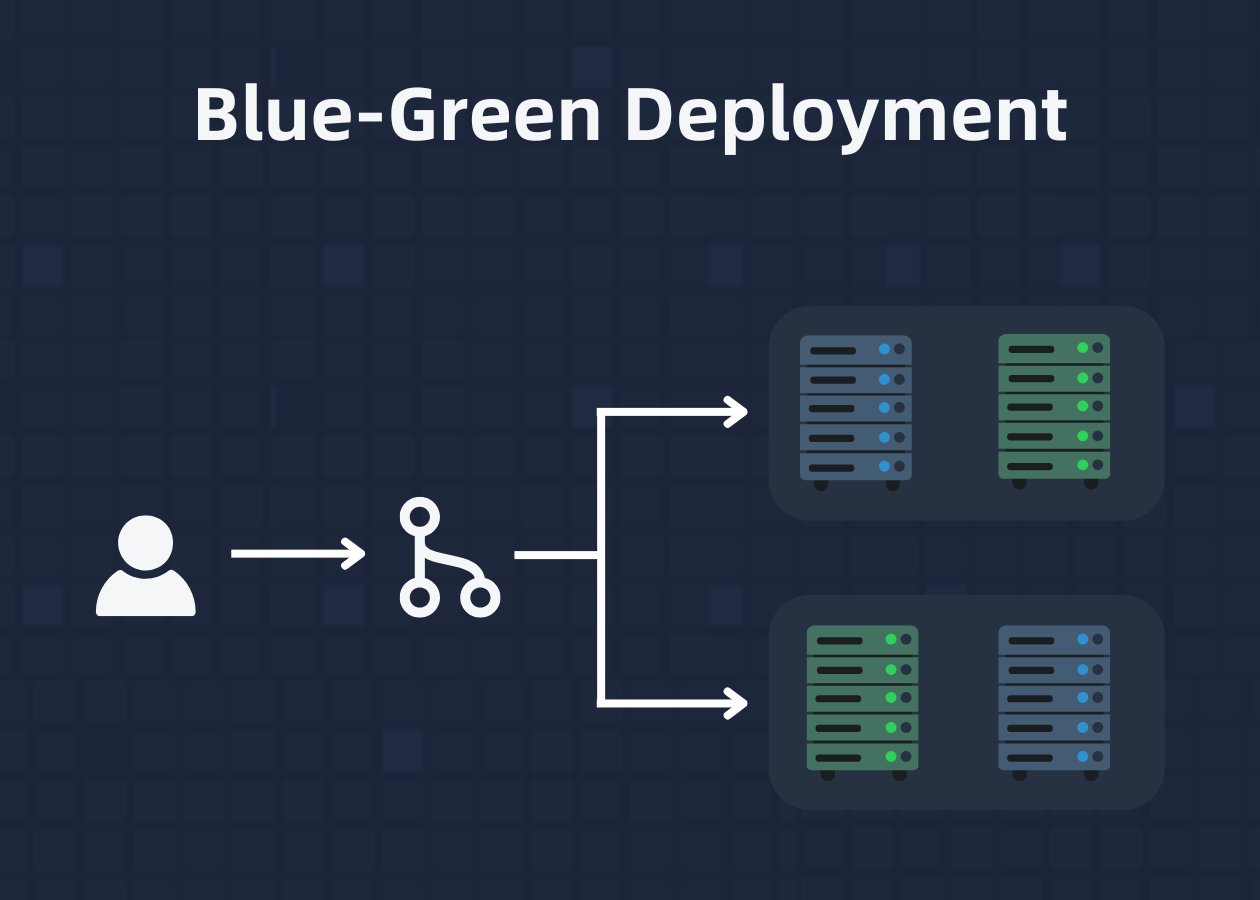
Example: Etsy is known to adopt blue-green deployments, running two parallel production environments and switching traffic seamlessly once new code is verified.
Canary Deployment:
Gradually deploy to a small user group to gather feedback and metrics before proceeding with a full rollout.

Example: Google tests new features on a limited group of users for services like Gmail and YouTube. Those are all the “Insider” or “Beta” Versions that you see.

Monitoring, Logging, and Rollbacks
If you reached this step, congratulations! You deployed your app! 🥳
Now, to ensure your application runs smoothly, implement a post-deployment monitoring system to track traffic, logs, application performance, and errors.
Monitoring Tools: For indie developers, it’s often sufficient to use the built-in analytics and monitoring tools provided by your hosting platform. For example, if you’re using Cloudflare, you can leverage Cloudflare Analytics to track performance and catch errors early. Similarly, Netlify offers built-in metrics that are excellent for monitoring your application’s performance.
If you need more advanced monitoring, you can consider open-source solutions like Prometheus and Grafana, but for most personal projects, the built-in tools should suffice.
Logging: Implement structured logging in your application and use the logging features provided by your hosting platform. For more advanced logging needs, you can use tools like ELK Stack (Elasticsearch, Logstash, Kibana), but for smaller projects, this might be overkill.
Here’s an example of GitHub Actions for deploying to Netlify:
yaml

name: CI Pipeline
on: [push, pull_request]
jobs:
  deploy:
    runs-on: ubuntu-latest
    steps:
      - uses: actions/checkout@v4
      - name: Set up Node.js
        uses: actions/setup-node@v4
        with:
          node-version: '22'
      - name: Install dependencies
        run: npm ci
      - name: Run tests
        run: npm test
      - name: Build
        run: npm run build
      - name: Deploy to Netlify
        uses: netlify/actions/deploy-to-netlify@v2
        with:
          netlify-site-id: '${{ secrets.NETLIFY_SITE_ID }}'
          netlify-auth-token: '${{ secrets.NETLIFY_API_KEY }}'
Final Thoughts
Adopt these best practices slowly and fit them to your project needs. Remember that deployment is an ongoing process. It takes constant learning, careful checking, and steady improvements to succeed.
Bonus Tips
Document Everything: Clear documentation ensures that you and the future you, can troubleshoot and update configurations without confusion.
Iterate and Improve: Deployment is a process of continuous Integration and Delivery ( CI/CD ). Analyse each deployment, learn from mistakes, and refine your pipeline.
Security First: Always review your deployment configurations and secrets management practices to prevent vulnerabilities. A small mistake can be catastrophic!
By following these steps and using the tools and strategies outlined above, you’ll build a robust, deployment pipeline, delivering a stable product!
Happy deploying!
Let’s Connect!
🐦 X/Twitter : a_kazos
💼 LinkedIn: alex-kazos
👨🏻💻 GitHub: alex-kazos